 Windows
 French Doors
 Patio Doors
 Front Doors
 Roller Shutters
 Window Sills
Windows
French Doors
Patio Doors
Front Doors
Roller Shutters
Window Sills
Window Sills
Windows
French Doors
Patio Doors
Front Doors
Roller Shutters
Window Sills

Wooden, aluminium or uPVC sliding doors are not just elegant; they also contribute to a positive living climate. The lift-and-slide technology simplifies the opening procedure. As the casement of these doors can be lowered down, they are tighter than other doors. Sliding doors can provide an energy efficient passage to the garden or balcony – even barrier free. But it is not always necessary to rely on professionals for the installation. The following instructions will show, in detail, how to easily install a new door yourself and without complications. For the installation of a sliding door, you will need to make sure to have all necessary tools and materials.
MATERIALS
TOOLS
Make sure to place all necessary tools and materials in the working area, before you start with the installation of the door. Re-measure the dimensions of the door reveal and prepare the surfaces. Uneven or dirty surfaces can make the adhesion of the sealing problematic. New sliding doors need to be installed, in accordance with the latest RAL regulations. When working with a group of four, the installation time should be between 2 and 4 hours (Fig. 1).
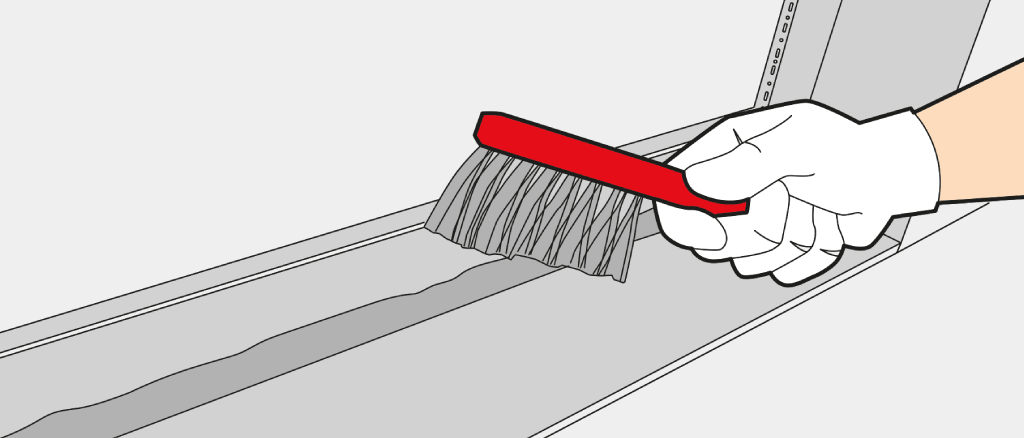
Fig. 1
Construction components are always covered with protection foil. Additional parts, such as handles, are usually not yet mounted. Follow the next steps to prepare your sliding door correctly (Fig. 2).
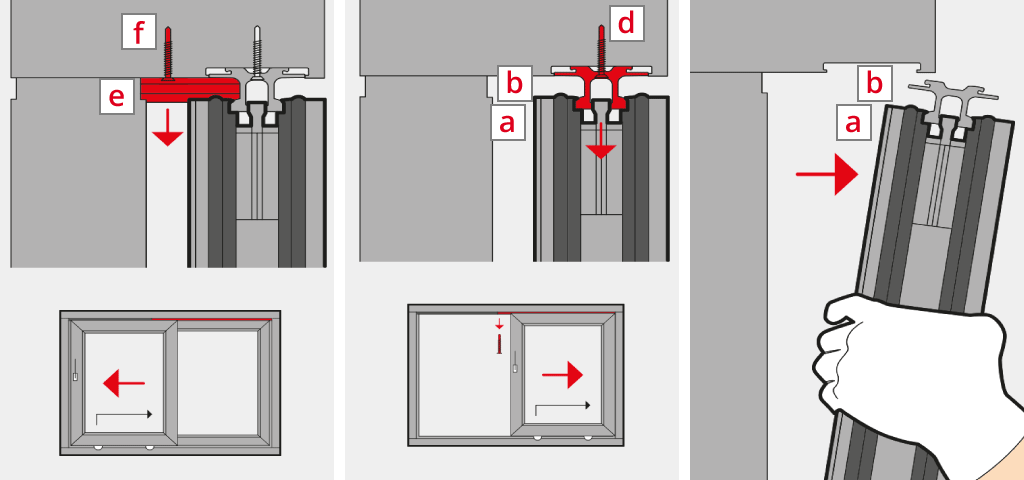
Fig. 2
In certain circumstances it is also necessary to remove the fixed glazing. It is usually mounted with glass strips that you can remove easily. Please work carefully and pay attention to avoid damaging the glass.
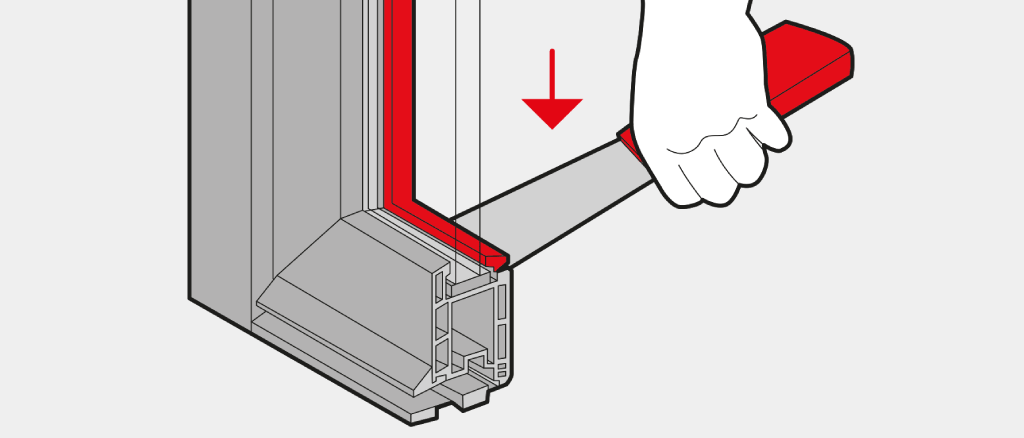
Fig. 3
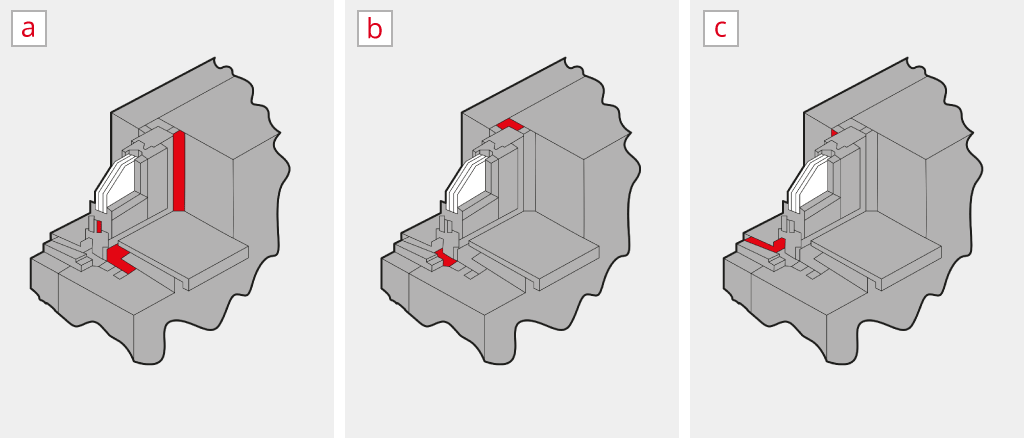
Fig. 4
In the next step you have to decide, which type of seal you want to use during the installation. The seals are divided into three installation levels:
Please note that carefully attached seals can prevent construction faults after the installation.
All important materials for the installation and further accessories can be ordered from the windows24.com online shop.
You need the sealing material (foil or tape), a bubble level and the adjustment blocks for this step.
After these steps are followed, the installation of the sliding door can be performed rapidly and safely.
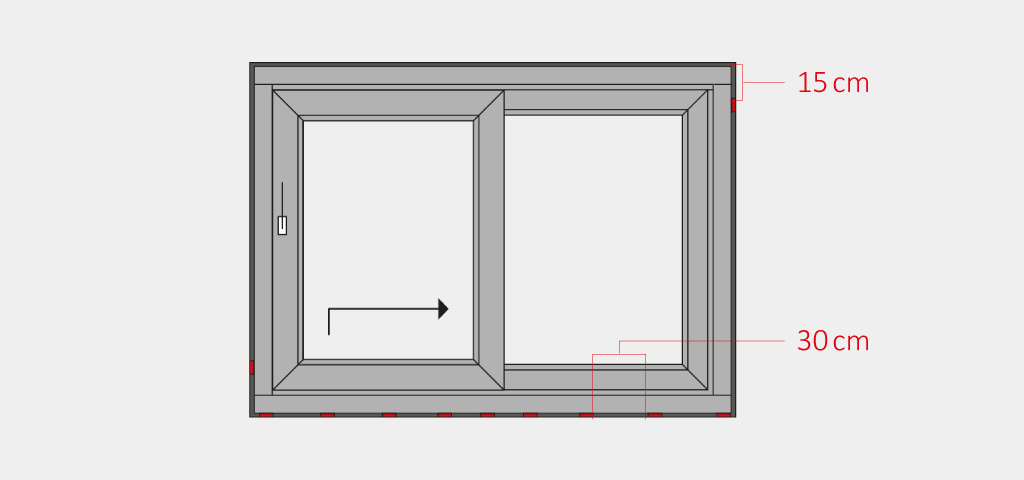
Fig. 5
In order to mount the frame into the masonry, you need a drill, the respective bits and the accompanying screws (Fig. 6)
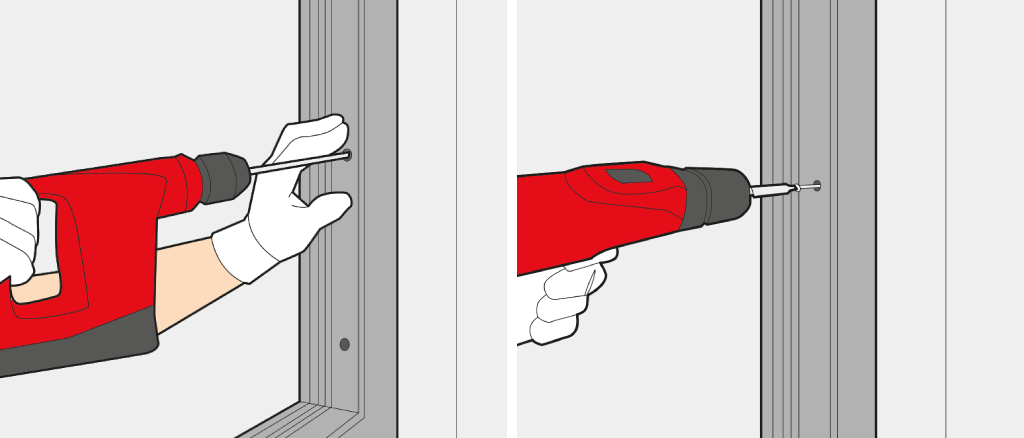
Fig. 6
It is of significant importance to seal the gaps between the frame and masonry, as it will protect the house from any entering humidity.
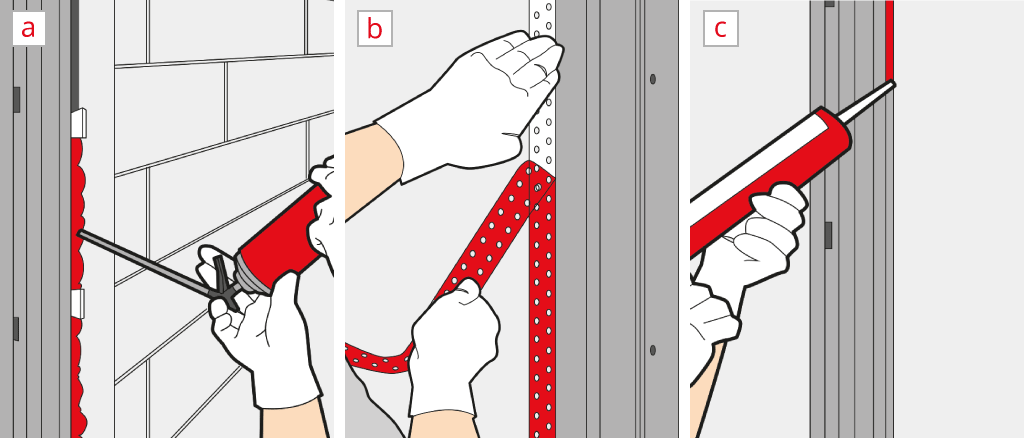
Fig. 7
The installation of the sliding door is complete once you have inserted the casement. Pay special attention when inserting to avoid damage to the seals (Fig. 8).
Fig. 8
After the installation you need to check whether the sliding door can be properly opened and closed. Please also check the tightness and re-adjust the door leaf if necessary.