 Windows
 French Doors
 Patio Doors
 Front Doors
 Roller Shutters
 Window Sills
Windows
French Doors
Patio Doors
Front Doors
Roller Shutters
Window Sills
Window Sills
Windows
French Doors
Patio Doors
Front Doors
Roller Shutters
Window Sills
All doors eventually need to be repaired or replaced. Perhaps they do not function properly, are damaged or need to be replaced with a more advanced model. Fortunately, the removal of a sliding door is not a very difficult task and can be performed even by laypersons without having to rely on professionals. In order to remove a sliding door, you will only need this manual, a saw, a crowbar and a helping hand.
MATERIALS
TOOLS
This manual only covers the removal of sliding door systems, but it can also be used as a basis for removing sash windows. In addition, the step of removing the doorframe is practically identical to the procedure used for other types of doors and windows.
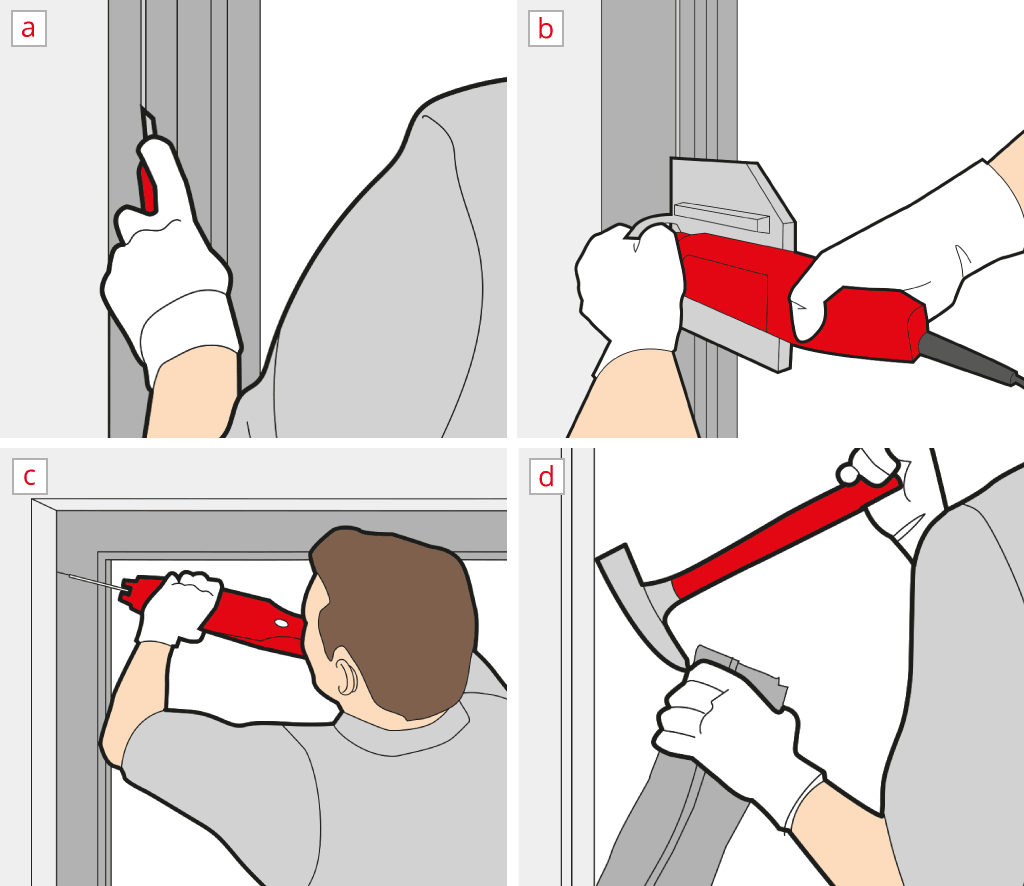
Please be aware that, while it is easy to simply remove the leaf from a lift-and-slide door, the doorframe itself will need to be cut into several pieces during the removal process – This will damage it beyond all repair. It is therefore quite important to have the new sliding door ready to be installed directly after removing the old model. This will prevent heat loss, draught and a lack of security owing to having an unprotected opening in your wall.
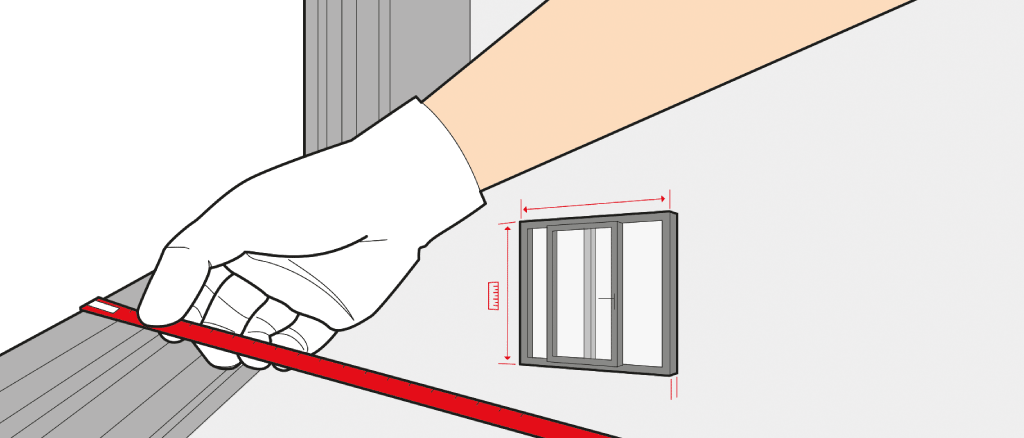
It is important to cover the area surrounding the door with sheets or mats and to have the necessary tools ready before starting with the removal procedure. The mats do not only collect dirt or dust that may be caused during the procedure, but they will also help to avoid damage to tiles and walls. Re-measuring the reveal’s dimensions and comparing them to those of the new sliding door is also of great importance at this point.
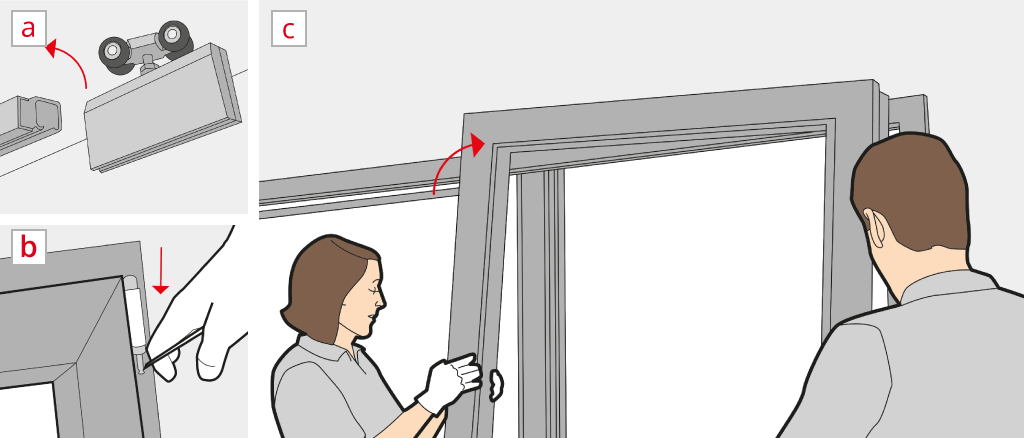
The removal of a lift-and-slide door does not require a lot of expert knowledge. You will, however, need strength, endurance and dexterity.
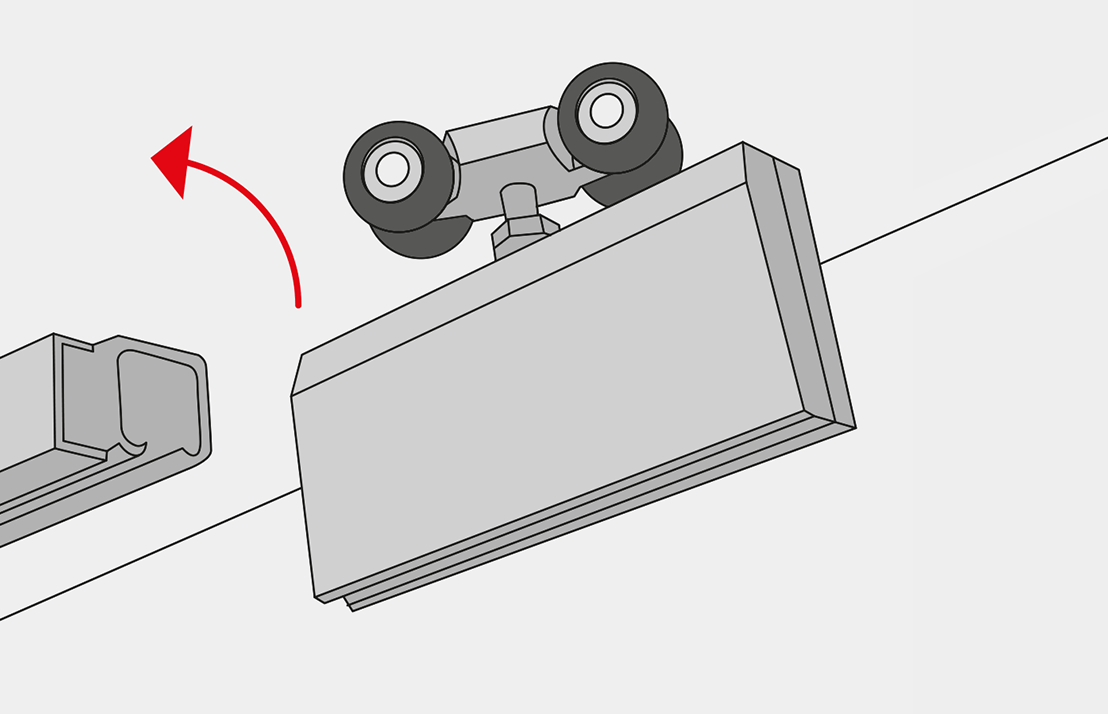
Removing the leaf of a lift-and-slide door is a procedure which is not only necessary for the replacement of an entire sliding door system. It can also be useful for repairing the leaf independently from the frame itself. As sliding elements with large glass surfaces can be very heavy, it is strongly recommended to remove these elements in a group of at least four people.
The next step is the removal of the frame. This task requires strength and determination.
It only takes a few simple steps to successfully remove a sliding door to repair or replace it with a new door of your choice. If you are planning on having your doors removed by a professional you may want to reconsider – you can save a lot of money by simply doing it yourself.