+++ Save online price advantage now +++

How to Install an Exterior Door

Exterior doors give visitors the first impression of a building. It welcomes guests and protects residents from temperature effects, noise and burglary. The choice of appropriate doors and the correct installation are therefore important factors in terms of aesthetics and security. Installing an exterior door does not always have to be performed by professionals. If you are a do-it-yourself enthusiast and want to install a door, you will only need the required materials, tools and this manual.


MATERIALS

  • New exterior door
  • Washers
  • Construction foam and cleaner
  • Vapour resistant foil and foil open to vapour diffusion
  • Screws to install the frame

TOOLS

  • Drill and impact drill
  • Stone or wood drill bits (6 mm)
  • Folding rule and bubble level
  • Construction foam gun


Please make sure to have all the necessary materials and tools within reach!


1. Preparation

You should always wait to install the door only once the necessary working materials and tools have been positioned within easy reach. Check the products and room conditions to make sure the install procedure can run smoothly.

  • Check the surface of the wall opening for dirt, dust and irregularities. Make sure to clean it first, as the required tapes will not be able to adhere properly otherwise (Fig. 1).
  • Re-measure the wall opening and the respective exterior door dimensions, to avoid potential problems during the fitting process. You can continue to install when all measurements match.

windows24.com recommends performing the installation in a group of two. It should take about 2-3 hours of work time to install the exterior door.

Fig. 1

2. Preparing the exterior Door for Installation

There are two simple steps that need to be performed to perfectly prepare the new element for installation:

Before you install the frame, you need to remove the protection foil from the outer shell of the frame completely, because this is difficult to achieve afterwards. The foil should be removed 3 months after delivery at latest, to prevent residue from remaining (Fig. 2).
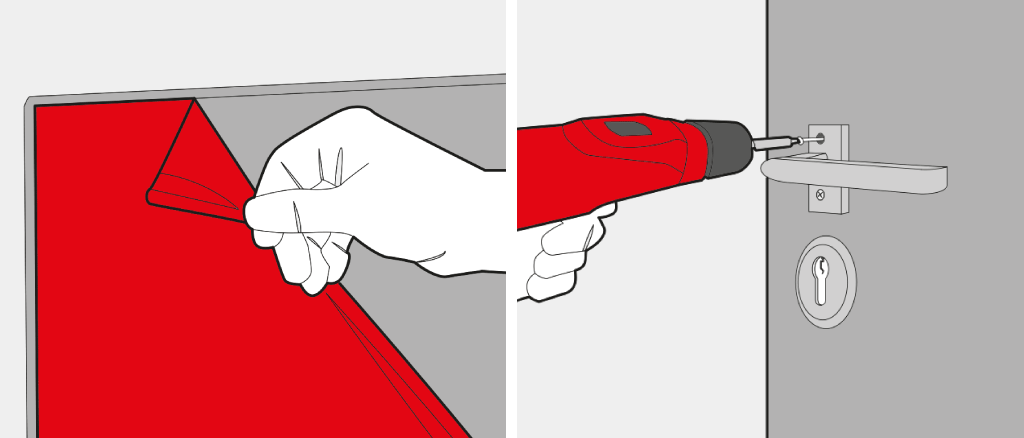
Fig. 2


Work carefully with the screwdriver and do not damage the surface.


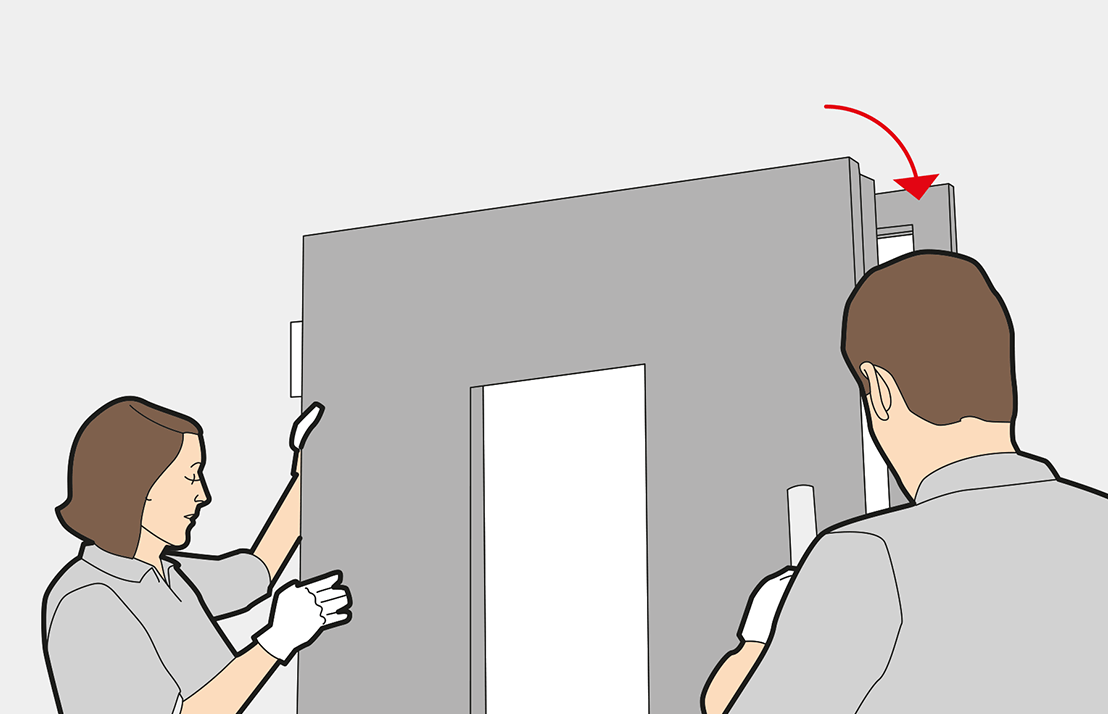
In order to install the new exterior door leaf, the old one has to be removed from the frame. Remove the locking pins from the hinges (The removing direction can differ depending on the mechanism). You can now lift off the leaf (Fig. 3).
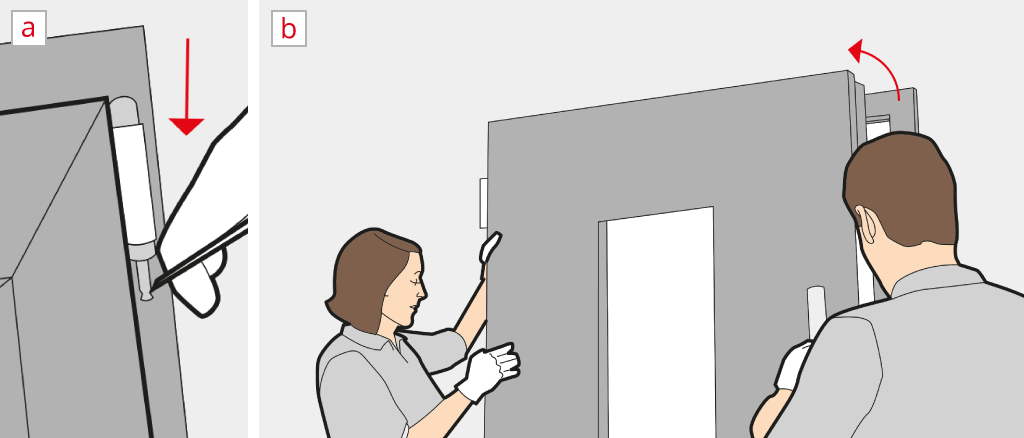
Fig. 3

3. Choosing the appropriate Sealing Type

In this step you have to select a sealing type for the exterior door. They are differentiated into three levels with several types and materials:
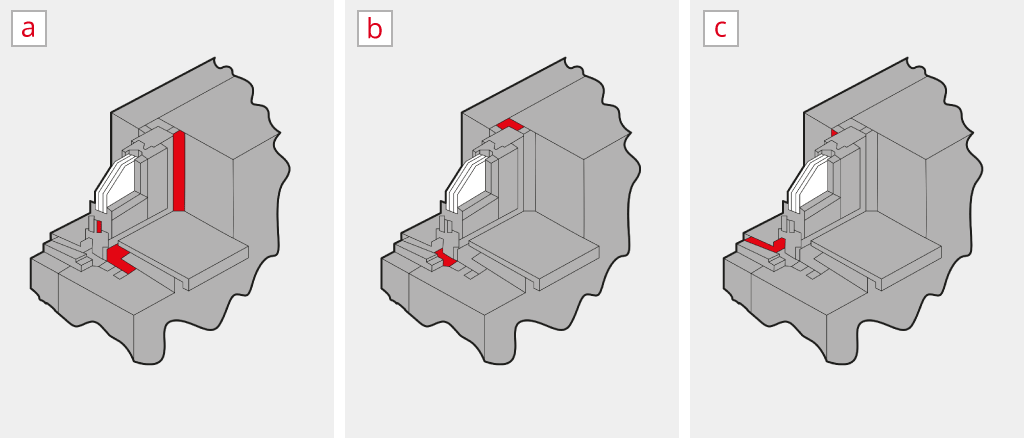
  • The inner seal divides room and outside climate. Therefore, you have to install vapour resistant materials. You can use vapour resistant foil for this task. Alternatively, acrylic jointing may be used as well (Fig. 4a).
  • The middle seal defines the space between the wall and the doorframe. It needs to be filled with insulating material completely, e.g. single-component construction foam, or filling material like mineral or cotton fibres and round cord (Fig. 4b).
  • The outer seal is the so-called weather-protection level. It has to be impact and rain proof as well as open to vapour diffusion. The most useful materials for this task are pre-compressed dealing tape or foil. The joints can alternatively be filled with silicon after the installation (Fig. 4c).

Fig. 4


The sealing of a window or exterior door can prevent building faults. If you install an exterior door, the sealing has to be tighter inside than outside. This will assure the insulation properties and improve the energy efficiency.


4. How to install and adjust an exterior Doorframe

The next step entails installing and adjusting the frame. You will need sealing tape or foil and a water level.

  • Attach the selected sealant on the outside and inside of the frame (vapour resistant foil inside and one that is open for diffusion or tape outside). You can also fill the joints with acrylic after the installation (Fig. 5a).
  • Carefully install the doorframe into the wall opening (Fig. 5b).
  • Use a water level and washers to vertically adjust it. If it is not perfectly balanced vertically, it may open and close by itself. To install correctly, you have to ensure that the frame has enough space between the floor and the lower edge to avoid sticking (Fig. 5c).

Fig. 5

5. How to screw in an exterior Doorframe

After the doorframe is well adjusted, you can screw it in. Use a drill for this task (Fig. 6).

  • Drill the mounting holes with an impact drill. Depending on the material, you will have to use a 6 mm wood or stone bit.
  • Screw in the frame with an impact drill until it is flush with the reveal.

6. Sealing and foaming the Gaps

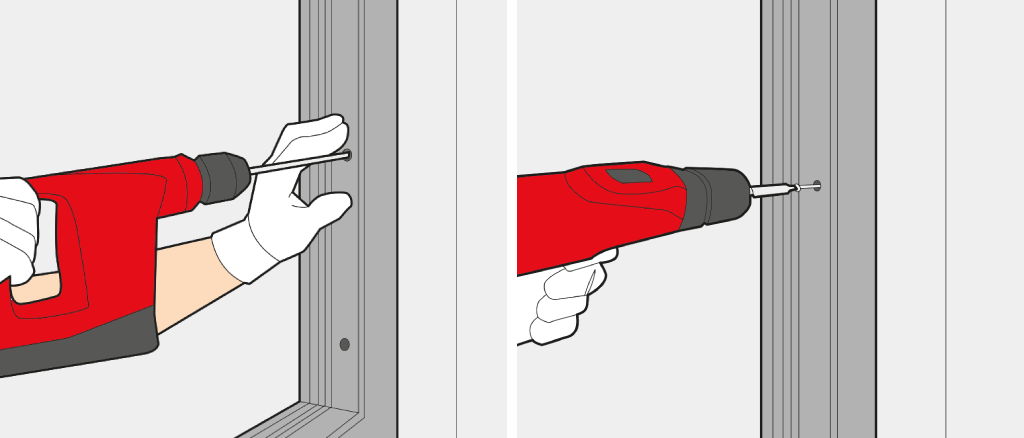
If you have used the "outer" sealing tape, you will have to wait to install the sealing until it has fully expanded.
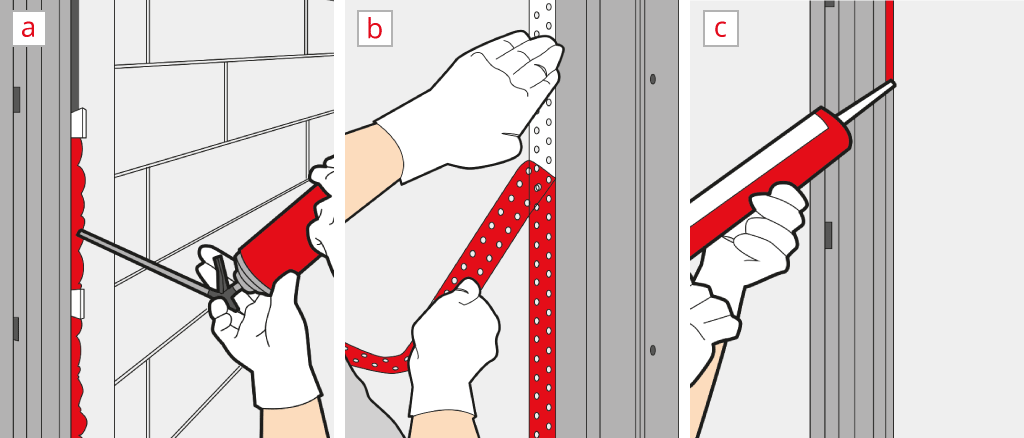
  • Foam the gap between reveal and frame. Please dose the foam carefully when you apply it. It will expand after contact with air. You can add more foam in a second step, if necessary (Fig. 7a).
  • Now use the "inner" seal. Attach the foil to the wooden wall or masonry and fill the joints (Fig. 7b or Fig. 7c).

Fig. 7

7. How to install and adjust the Leaf of the exterior Door

The last step of the installation of the exterior door is the inserting and adjusting of the door leaf.
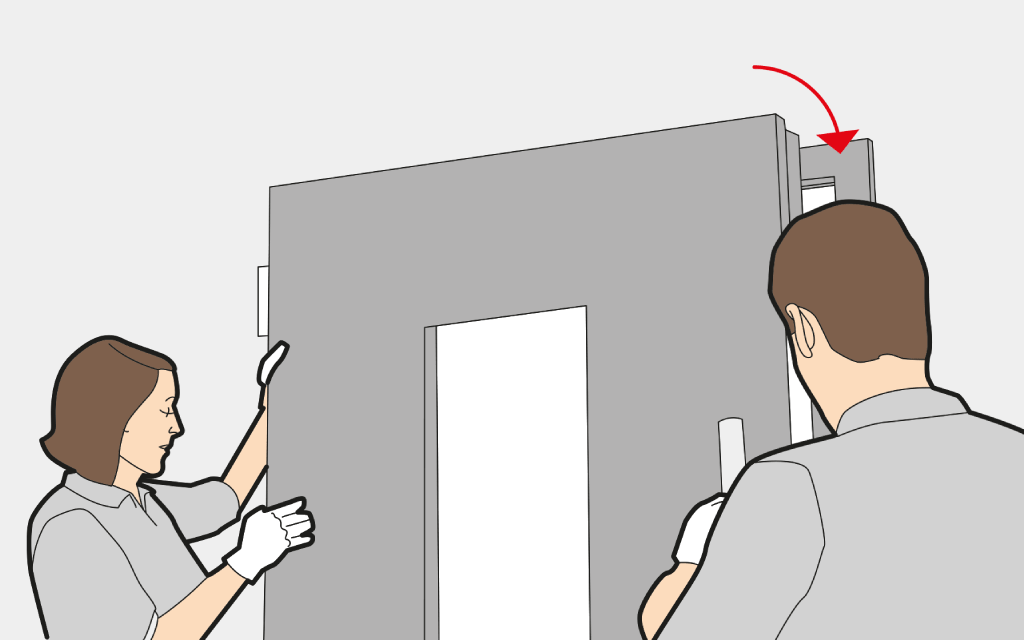
  • In order to install the leaf, you need to centre the hinges of the frame and leaf.
  • Re-install the locking pins into the hinges.
  • Check the opening and closing behaviour of the exterior door and its tightness. If the door gets stuck at a certain point, you have to re-adjust the construction (Fig. 8).

Fig. 8

After all steps are performed properly, the installation is complete and your new entrance can start welcoming guests.

Was this information useful?
1
2
3
4
5
(3 ratings , Ø 5)
to top