+++ Save online price advantage now +++

How to Remove a Window

You do not need to rely on professionals if you want to remove a window. A good do-it-yourself enthusiast can do this on their own by using the right tools and this step-by-step manual. Depending on the age of the respective window, you have to consider certain facts while removing it. The following manual and the corresponding video will show you, in detail, how you can remove uPVC, aluminium and wooden windows effectively on your own.

Materials

  • Covering foil
  • new window(s)

Tools

  • Electrical rip saw (reciprocating saw)
  • Hand-held milling machine (not required, but useful)
  • Hammer
  • Crowbar
  • Screwdriver
  • Pincers
  • Ladder

When you remove a window, you have to pay particular attention to safety. You should always work with gloves and use safety glasses to protect your eyes from flying particles.

1. Preparation

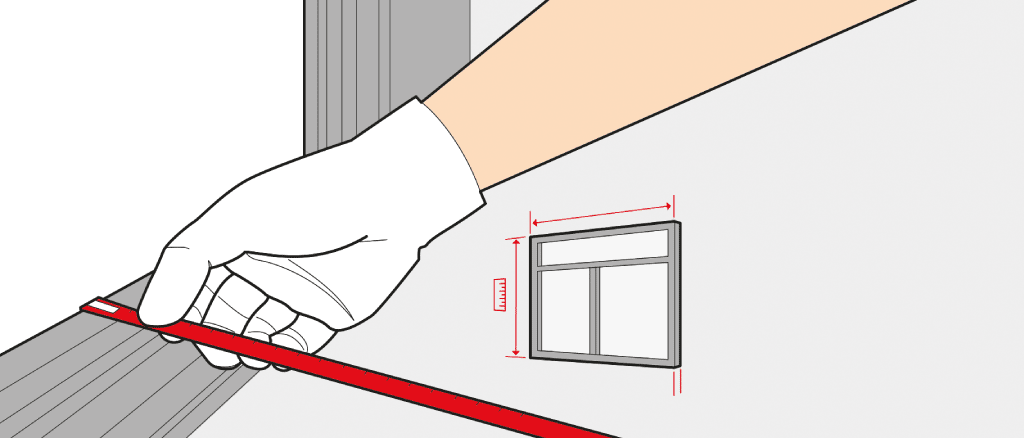
Before you start removing your window, it is recommendable to cover floor and furniture with covering foil. Then you should re-measure the reveal and compare the measurements with those of the new windows. If the measurements match, you may start the procedure (Fig. 1).


Caution: Measuring old buildings is different to measuring new buildings. A detailed manual on measuring may be found here.

2. How to remove the casement

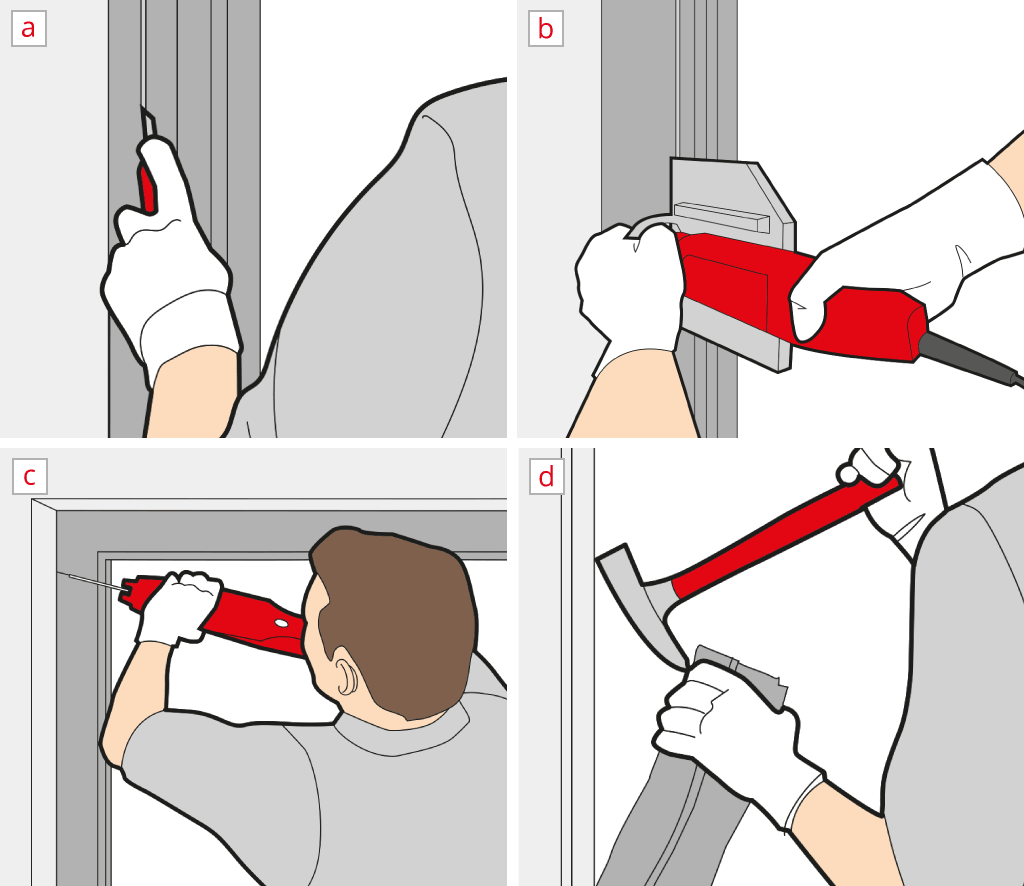
The procedure is started by removing the casement. Depending on the age of the door, different procedures may be called for at this step. Furthermore, it is important to know whether you want to remove a tilt and turn casement window or one which can only be turned.


a) How to remove older wooden windows

When dealing with an older window model, it has to be removed as follows:

  • If the window has a tilt-turn mechanism, open it, turning the handle into tilt position afterwards.
  • Now lift the casement until the pins leave the corner bearings. Then, grab the brackets (the component that holds the window in the tilt position) and remove it.
  • If the window does not have a tilt function; you can simply open and unhinge it, as you would do with a standard door. Please be aware of oily pins that could soil the wall (Fig. 2).

A helping hand is very useful when removing windows. Holding the window and removing the brackets simultaneously is very difficult for one person.

b) How to remove wood, aluminium or uPVC-windows

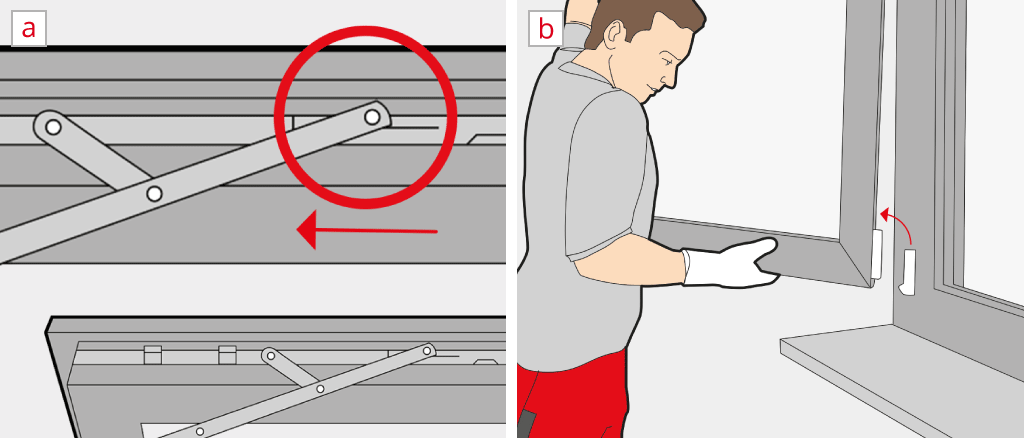
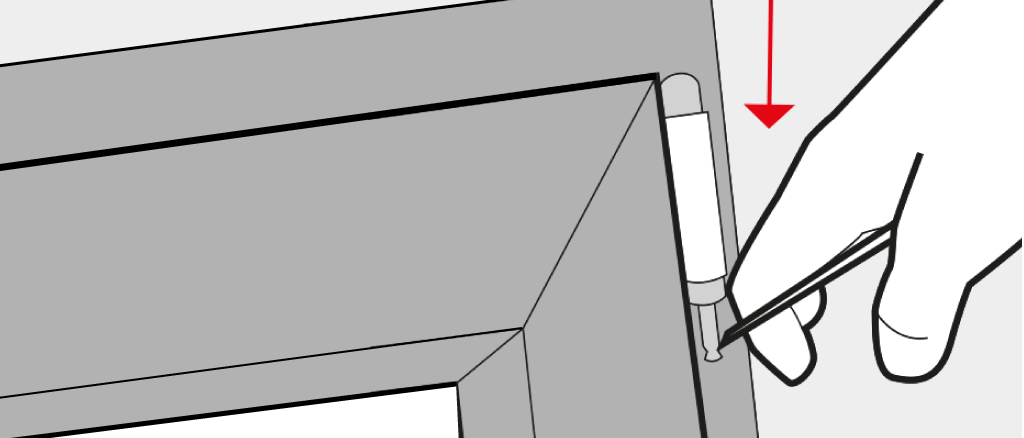
Modern windows - no matter if made of wood, aluminium or uPVC - can be removed easily in comparison to older ones. The only tools required are a pincer and a screwdriver.

  • Whether or not the window has a tilt and turn mechanism, you can simply open the window and pull out the pin that connects the brackets to the casement.
  • To pull out the pin, you need to remove the plastic covering from the bearing. This is best done using a pincer or a screwdriver.
  • When the bearing is exposed, simply pull the pin out in a downwards direction (Fig. 3). Now you can remove the casement by lifting it out of its hinges.


3. Removing the frame

The frame keeps the window in its location and is connected to the masonry. This is were you will need to use the crowbar and the rip saw (or milling machine).

  • Before the frame can be removed, top-mounted roller shutters may need to be removed first. If you have a roller shutter with a box mounted on the exterior wall, you only need to remove the guides. If there are no shutters at all, you may skip to the next step (Fig. 4a).
  • In order to remove the frame, you need to cut along it with the milling machine. If you do not own such a tool, you can use a reciprocating saw instead. Normally, there are no connections in the upper and lower parts of the window. This is why it is usually sufficient to cut to the left-hand and right-hand sides (Fig. 4b).
  • To assure safe removal, you need to cut the frame into several pieces, which may be done with the rip saw. Normally you will need only six cuts: 2 x left, 2 x right, 1 up and 1 down. If possible, cut in a V-shape, to avoid jamming parts while you remove them (Fig. 4c).
  • Push the crowbar under the frame and lever the pieces away from the window alcove. Make sure that the frame is removed from the masonry completely. If the frame is still connected to the masonry, simply cut again in the respective area (Fig. 4d).

This step-by-step manual allows you to remove your window in a simple and effective way - a similar procedure is also used for the removal of balcony doors. There is also a video manual, showing the entire procedure step-by-step.

Was this information useful?
1
2
3
4
5
(7 ratings , Ø 4)
to top