+++ Save online price advantage now +++

Manual for the Installation of a Window

There is not always a need for professionals if you want to install a window. With the help of the correct materials and tools, most do-it-yourself enthusiasts can easily install windows themselves. In order to avoid common mistakes, simply follow this step-by-step manual and read the useful tips for the installation. The following manual will show in detail how the process would be performed by a professional and can help you avoid thermal bridges that may arise during the installation of the window if the frame is not adjusted correctly.

Materials

  • the new window
  • construction foam
  • construction foam gun
  • construction foam cleaner
  • screws
  • washers
  • vapour proof foil
  • vapour diffusion foil
  • alternatively trioplex sealing tape

Tools

  • drill
  • impact wrench or impact drill
  • stone or wood drill (6 mm)
  • yard stick
  • bubble level
  • construction foam gun

When installing doors, you will need the correct material and tools. Please pay attention to the following list when preparing for the installation.

Safety should always have top priority during the installation of a window. Make sure that you have gloves and working glasses at hand.

1. Preparations

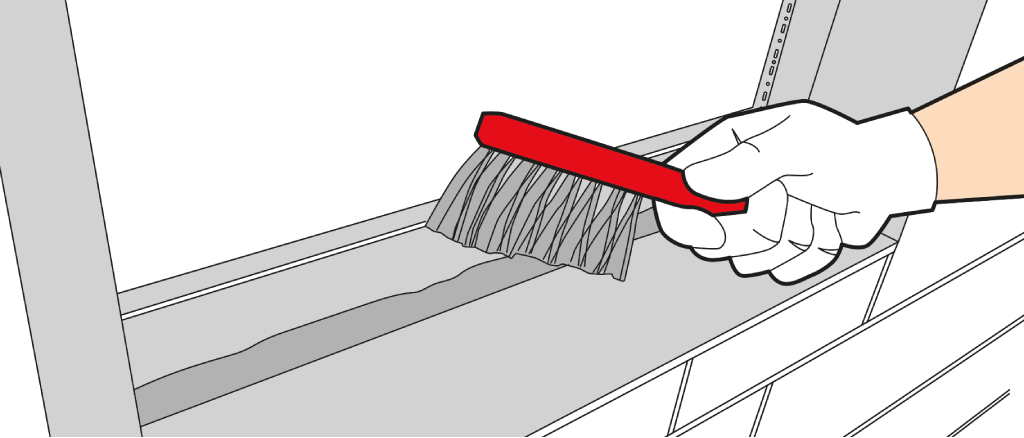
Make sure to have all necessary tools and materials before starting with the installation of the window. If old components need to be removed first, please visit this link. Then check the following conditions afterwards:

  • Are the wall reveals smooth and dust-free? You will need excellent surface conditions. This is the only way to ensure a perfect hold of the seal and an installation according to contemporary quality standards (Fig. 1).
  • Do the measurements of the window reveals match the window dimensions? For a successful installation, you need to check whether length, width and depth measurements match.

If these conditions are given, you may start with the installation of your window. We recommend performing the installation with a helper, estimating between two and three hours until completion.

2. Preparing the window

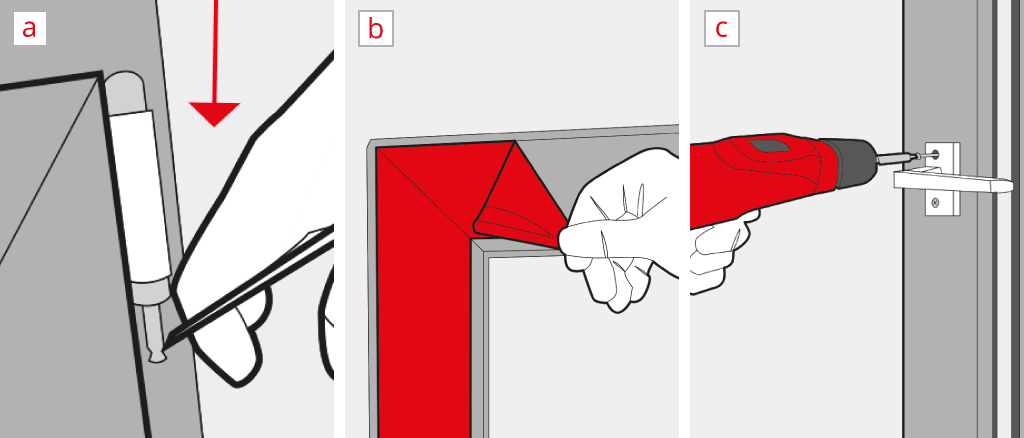
Remove the protective film from the frames before the installation of the window. It is very difficult to remove it afterwards (Fig. 2b). The other films should remain in place to protect the surfaces during the installation.

  • Mount the handle to the casement so you can open it to remove the casement afterwards (Fig. 2c). You will have to pull the security pin out in a downward direction using a slotted screwdriver (Fig. 2a). Now open the window casement and pull it out upwards. You will find a precise manual for removing the casements here.
  • Protect the removed casement from any damages by placing it on a soft surface. Wooden, aluminium as well as brightly coloured frames are especially vulnerable to scratches, which are very hard to remove afterwards.

3. Choosing the correct seal

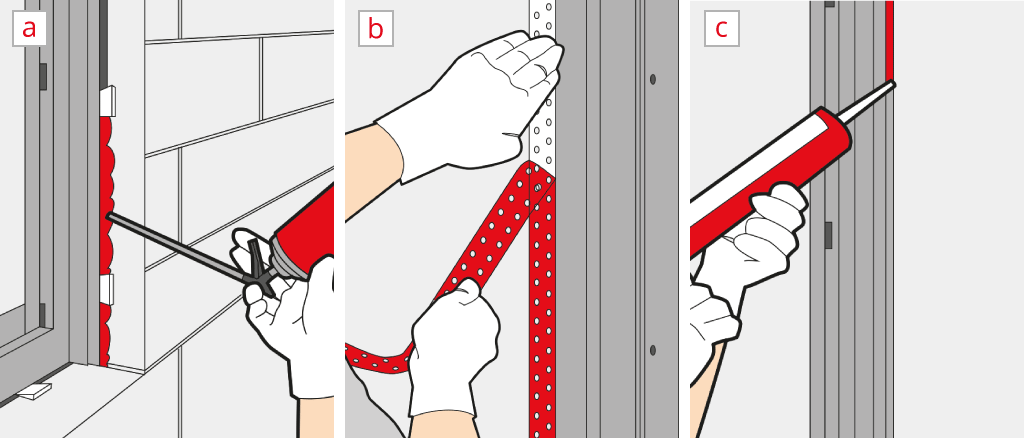
For the installation of windows you will have to decide between different kinds of seals. We distinguish here between three layers:

  • "Inner" seal: separating inner and outer climate (Fig. 3a)
  • "Middle" seal: defines the space between window and wall (Fig. 3b)
  • "Outer" seal: serves as weather protection layer and needs to be weatherproof (Fig. 3c)

This results in different requirements for each seal:

  • The inner seal should be impervious to vapours.
  • The middle seal should be filled with thermal insulation materials.
  • The outer seal should be open to vapour diffusion.

In order to ensure that the window is sealed perfectly, different materials are needed. You may find their respective specifications here:

  • Inner: Use vapour resistant foil or acrylic grouting material.
  • Middle: Polyurethane construction foam is most suitable for this task. Alternatively you can use filling materials like mineral or cotton fibre materials.
  • Outer: We recommend pre-compressed sealing strips or foils that are open to vapour diffusion. Silicon grouting material is also a possibility.

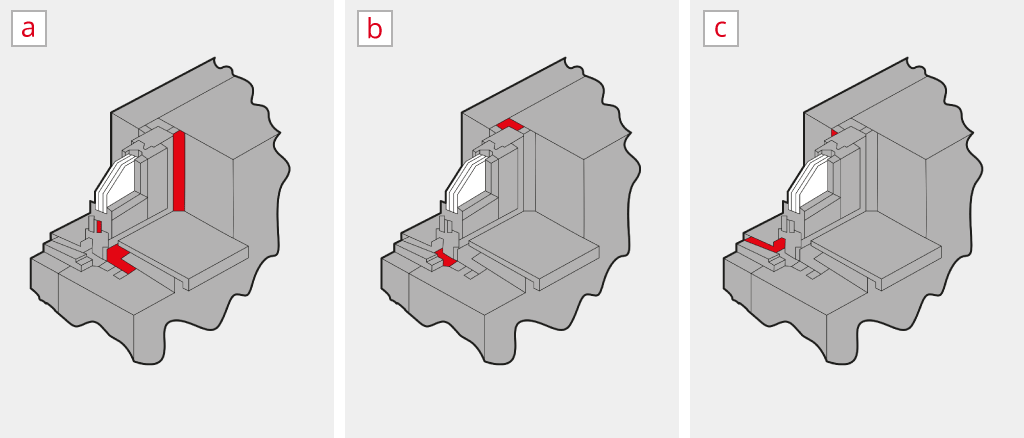
All materials necessary for sealing can be found quickly and easily in our accessories shop.

During the installation of your window you should always take into consideration that the sealing is an essential protection against building faults.

4. Installation and adjustment of the frame

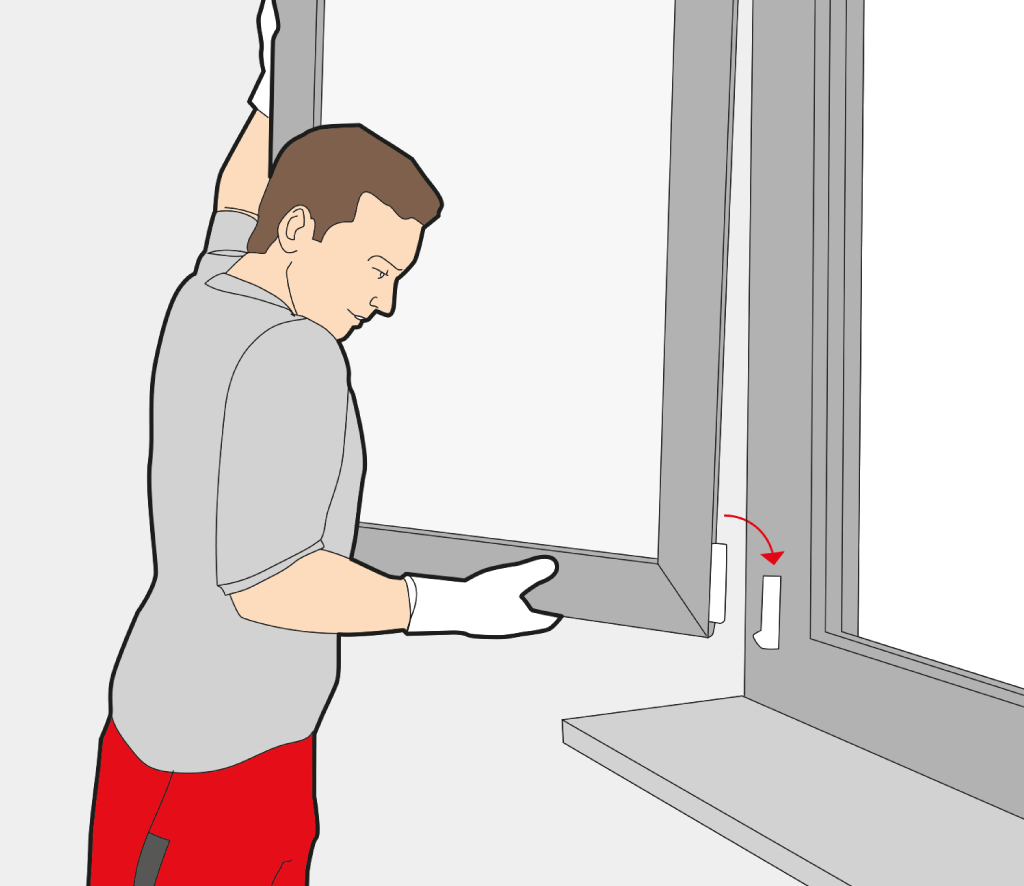
Now you need to insert the frame. You will need a bubble level and perhaps the washers.

  • Apply the sealing material to the frame (Fig. 4a) and insert it into the wall opening (Fig. 4b).
  • Adjust it using the bubble level (Fig. 4c). The washers may be used to balance out uneven window openings.

Make sure that the window is completely level during installation, so it may be opened smoothly. An uneven installation might interfere with turn-and-tilt mechanisms or negatively impact the operation of skylights.

5. Screwing in the frame

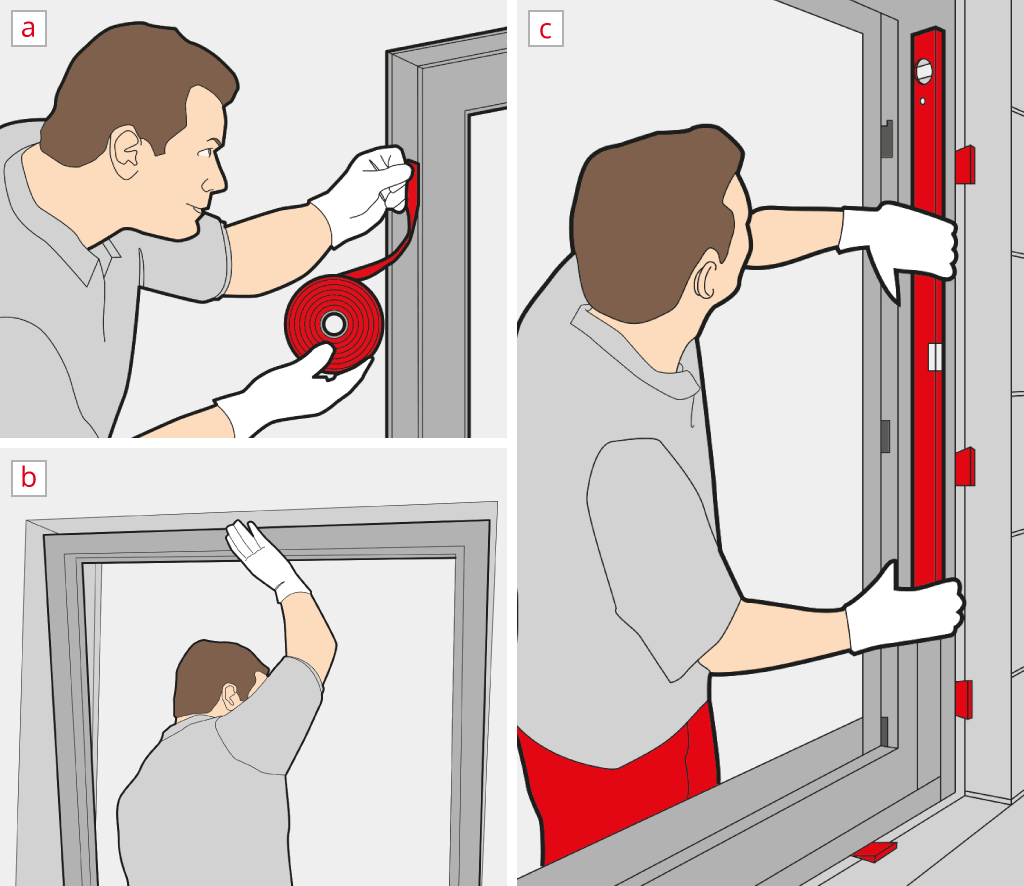
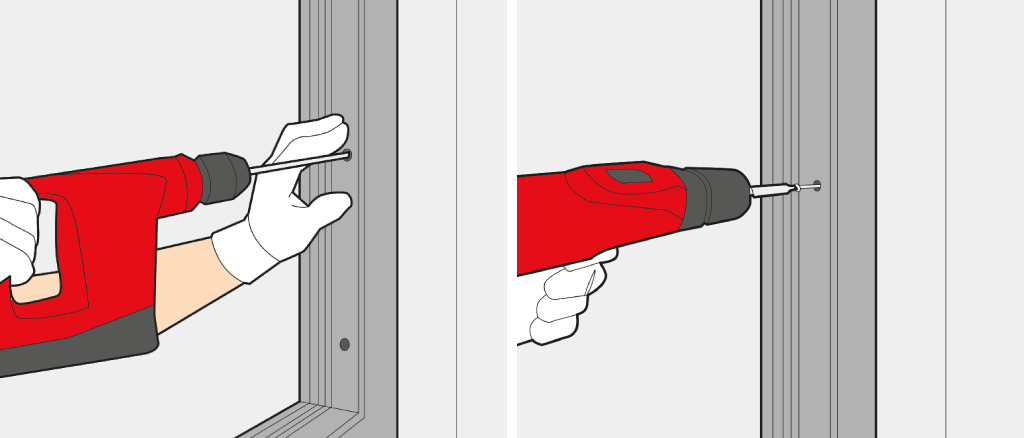
To ensure proper window installation, the frame has to be fixed to the wall at this point, using screws to fit it tightly to the masonry (Fig. 5).

  • Pre-drill holes using a power drill. Because of potentially different materials used in the original construction of the wall, fragments may break loose and damage furniture, windowsills or the floors. In such cases, dowels may be employed for a tighter fit, while eyeglasses or blankets for furniture can protect against fragments.
  • Use the drill for screw insertion. The frame is now connected with the masonry. During the next step you will be filling the gaps between these two elements with foam for good thermal insulation.

6. Foaming and sealing the gaps

If you decided to use sealing tape on the outer layer and foil for the inner layer of the window, you will need to wait with the foaming until the sealing tape is fully expanded.

  • Now fill the gaps between frame and masonry with construction foam. Dispense the foam with great care, as it will expand after being injected (Fig. 6a).
  • Attach the foil to cover the masonry entirely (Fig. 6b) or grout the layer respectively (Fig. 6c).

During the last step you need to insert the casement into the frame.

7. Installation and adjustment of the casement

When all steps have been completed, you can start inserting the casement of the window and adjusting it. You will find a detailed manual for the precise adjustment procedure here:

  • Insert the casement and check whether can be opened and closed smoothly (Fig. 7).
  • If it jams or squeaks, you will have to re-adjust the casement.

This manual can assist laypersons with the installation of windows. If you would like to have your windows installed by professionals, however, windows24.com can also help you with finding a qualified window fitter in your region.

Was this information useful?
1
2
3
4
5
(1 ratings , Ø 5)
to top