+++ Save online price advantage now +++

The Installation of a Top Mounted Roller Shutter

Whether working on an old or a new building: anyone deciding to install a built-on roller shutter system should focus on quality. Only high-quality products offer reliable insect and sound protection as well as thermal insulation. The installation should be performed in a professional manner and with care. You will be pleased to know that new built-on roller shutters do not need to be installed by professionals. This manual will show you how to install these components in a simple and straightforward way.

Materials

  • The new built-in roller shutter
  • Trunnion screw
  • Guiding rail elements
  • Fixation screws
  • Cleaning agent

Tools

  • Electric screwdriver
  • Hammer
  • Tape measure
  • Balance
  • Pencil


Please note that these types of systems are installed at the upper part of the profile. A built-in roller shutter reduces the dimensions of the wall opening and combines the component itself with the window. It is therefore important to determine the measurement including the height of the built-in roller shutter.

1. Preparation

No matter which type of roller shutter you want to install – built-in, built-on or a mounted system for a wooden, aluminium or uPVC window. It is important to have all of the necessary tools and materials at the working place for a smooth installation.

Although built-in roller shutters are appropriate for subsequent installation, you would have to open up parts of the masonry. It is therefore recommendable to perform this type of installation when the entire window is to be exchanged or to be installed in a new building. This manual will guide you through the different steps of the installation. You can easily order all necessary construction elements for the installation of a built-in roller shutter with a few clicks at windows24.com.

  • Please re-measure the dimensions of your windows before you start to install the shutter system. This prevents complications and can ensure a smoother installation of the built-in roller shutter. Bear in mind that there are different ways to determine the measurements, depending on the respective windows and doors. It is also important to know whether you are taking the measurements of an old or new house.
  • Remove the built-in element from the packaging and place it with the accessories next to the new window. Place the parts on a soft mat, e.g. blankets or cardboard.

It is recommended to organise a helper, especially when installing aluminium or uPVC built-in roller shutters. The weight of the guiding rails and the respective box can be too much for one person. Please consider working in a group of two.

2. Preparing and adjusting a Built-in Roller Shutter

  • Before the installation of the complete system, you should remove the covering foil from the outer surface of the frame as well as the upper part of the frame inside.
  • Carefully clean the upper surface with a cleaning agent.
  • To prevent transport damages, protection foil is also attached to the built-in roller shutter. Remove it from the downside of the box and from the adhesive strip to start the installation procedure.
  • Now you can place the built-in roller shutter box on top of the frame. The adhesive strip must not touch the frame yet. There should be no space between the masonry and the built-in roller shutter and it must be flush with the frame on the sides.
  • When the system is adjusted correctly, you can continue with the installation and attach the adhesive strip to the frame (Fig. 1).

3. The Installation of the L-profile

  • You will find an L-profile in the accessories kit. Remove a few centimetres of the protection foil from the profile and push it into the gap between the roller shutter box and the window profile.
  • When the L-profile is adjusted correctly, you can remove the adhesive strip completely and attach it to the window profile (Fig. 2).

4. The Installation of the Mounting Angle

  • There are covers attached to the sides of the built-in roller shutter box. You can remove them now.
  • The mounting angles can be found in the guiding rails packaging. Take them out to start with their installation.
  • Mount the angles with a cordless electric screwdriver to the sides of the window frame and the shutter box with the accompanying screws X578 (3,5 x 19 millimetres) (Fig. 3)

5. Inserting the Guiding Rails

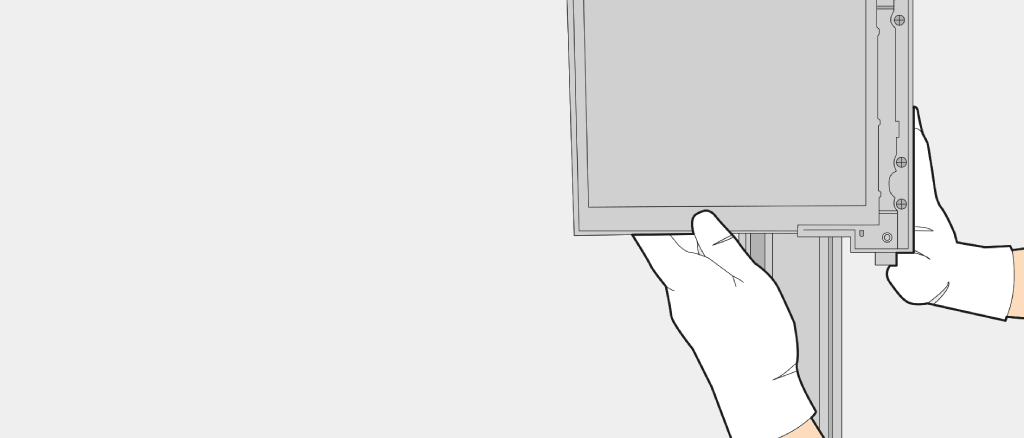
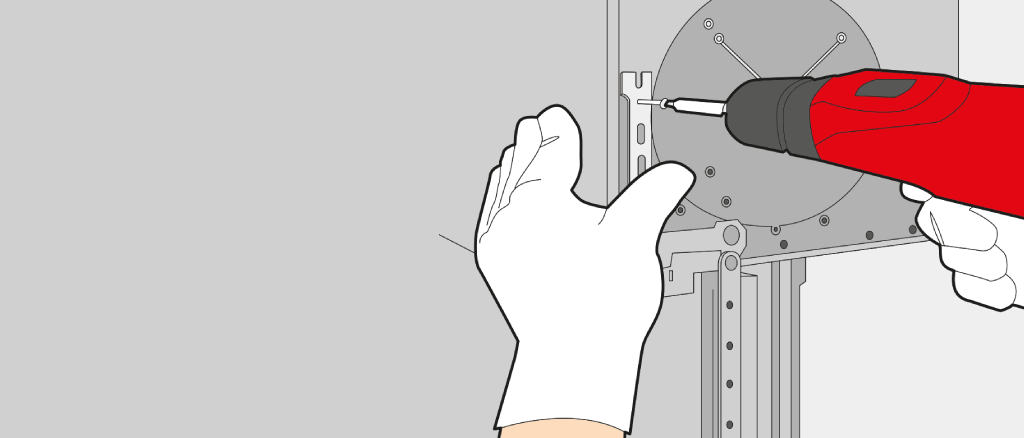
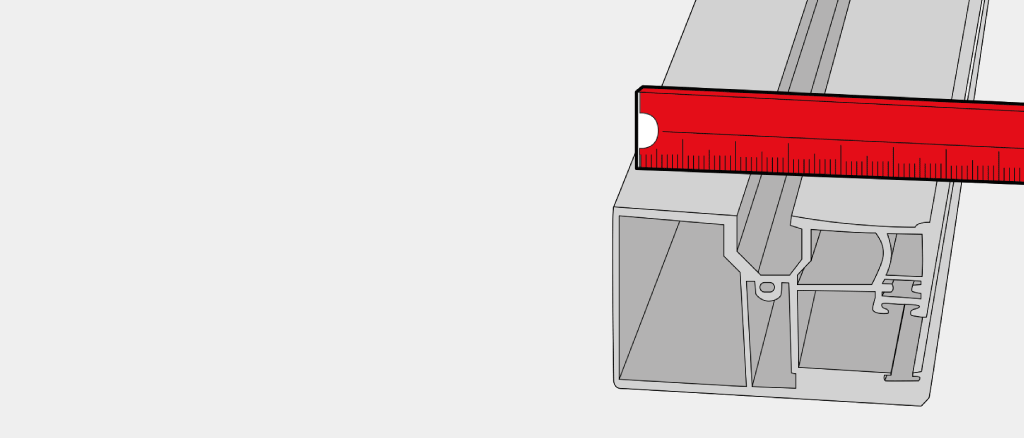
In order to install the guiding rails for your built-in roller shutter on the exterior of the window, you have to determine the position for the trunnion screws. They will serve as the mounting location for the guiding rails.

  • Measure and locate the centre of the groove of the guiding rails and transfer the measurement to the exterior of the frame.
  • It is important to check the vertical alignment of the trunnion screws on the outer frame of the window. This will ensure that the built-in system works perfectly after installation. You can draw a thin line with a pencil from top to bottom.
  • Now you can insert the trunnion screws. Use the screwdriver and distance roughly 300 millimetres between the holes on the pencil line.
  • In the next step you have to install the guiding rails. Remove 10 centimetres from the protection foil on the left and right side and place the rail on the mounted trunnion screws. If you lightly tap the area in the height of the trunnion screws the rail should snap in smoothly (Fig. 4).

These guiding rails are usually installed flush with the exterior frame of the window. You will therefore have to take the measurement from the centre of the rails inwards.

6. The Installation of the Drive

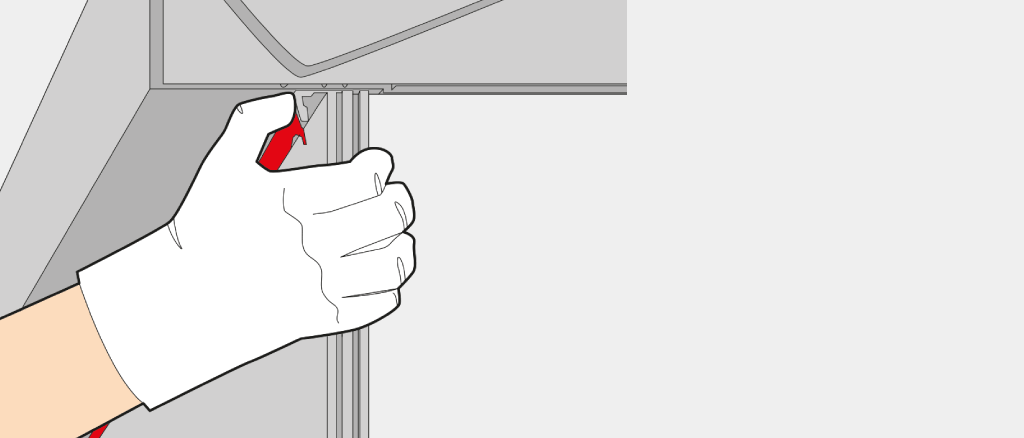
You will have to remove the foil from the interior part of the frame, where the cord winder – with or without motor – is to be installed.

  • Mark the respective position with a pencil
  • Take the drive (e.g. the cord winder) out of the packaging. It can be found inside the packaging on the side of the built-in roller shutter box.
  • To install the respective drive, you have to take the accompanying screws out of the packaging and mount the system at the marked position.
  • To perform a first test run, you have to remove the transport lock from the roller shutter box. The installation has been successfully performed once the components work properly.

This manual will help with the quick installation of a built-in roller shutter made of uPVC or aluminium, which will bring you several benefits. Besides better insect protection and thermal insulation, a rolled down roller shutter furthermore improves burglary protection and serves as an additional locking device. Would you like to learn more about the installation of a built-in system, you can find a detailed video on the topic here. 

Was this information useful?
1
2
3
4
5
(1 ratings , Ø 5)
to top