+++ Save online price advantage now +++

How to Install a Window Sill

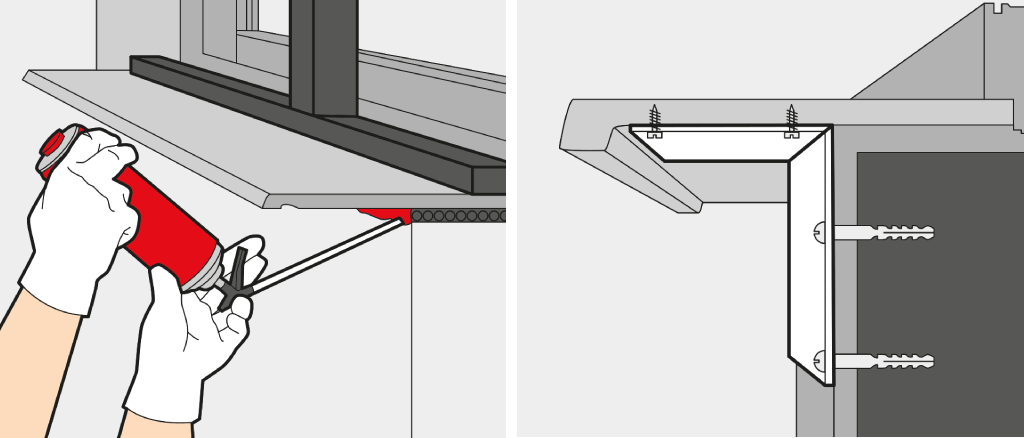
Would you like a better thermal insulation or improved aesthetics for your home? No matter which preferences you have, there are several factors to consider, if you want to install a new window sill. Similar to the installation of a door or window, there is no need to hire a specialist. This manual will show you how to avoid problems and how to install these components easily yourself and without costly professional help. To install a window sill, having all the tools and materials necessary at hand and ready to use is a very important step.

Materials

  • The new window sills
  • Supplied protection tape
  • Side finishes
  • Supplied screws
  • Construction foam (alternatively cement or construction adhesives for tiles)
  • Optional: special sealing
  • Optional: mounting angles

Tools

  • Hammer
  • Crowbar
  • Cordless screwdriver
  • Balance

1. Installing a Window Sill inside

This type of installation includes certain characteristics. You should cover the working area with a protection mat, to avoid damage by flying fragments. Please make sure that everything is covered before you start with the preparation

You can decide whether to use foam, cement or construction adhesives as a fixing material. But be aware that the foam will expand after contact with air, causing the window sill to lift up. More foam can easily be applied at a later time.

a) Preparation

Before you can install a window sill inside, you should check several conditions:

  • Do you have all necessary materials and tools?
  • Has the old sill been removed properly? To make sure, check here

You can install a new element without relying on professional help. Normally it takes about 30 minutes to install a new window sill, whereas the installation of more than one will respectively demand more time.

b) How to install the Component

Once the relevant tools and materials are available and the old elements have been properly removed, you can start to install the new sills (Fig. 1).

  • Before you install the window sill, you have to make sure that the joints are sealed airtight
  • Place the sill under the window and adjust it vertically with a balance and washers.
  • When using construction foam, the sill has to attach firmly. Make sure that it cannot be lifted up by the expanding foam.
  • It is also possible to only partially foam the surface, as its strong adhesion is sufficient.
  • A complete foaming is only recommendable between the seal and outer wall.
  • Please keep the fixation in place until the construction foam is cured.

Use additional mounting angles if the board extends more than 100 mm from the masonry. This will provide sufficient stability.

2. Installing a Window Sill outside

The outer install conditions differ from the inner ones. Depending on the working area, you may waive the use of a protection mat. Please keep in mind the necessary preparatory procedures.

a) Preparation

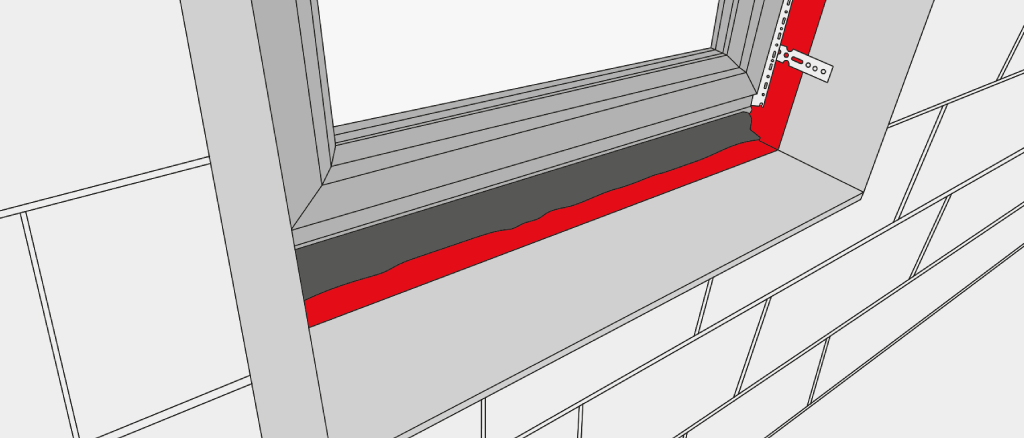
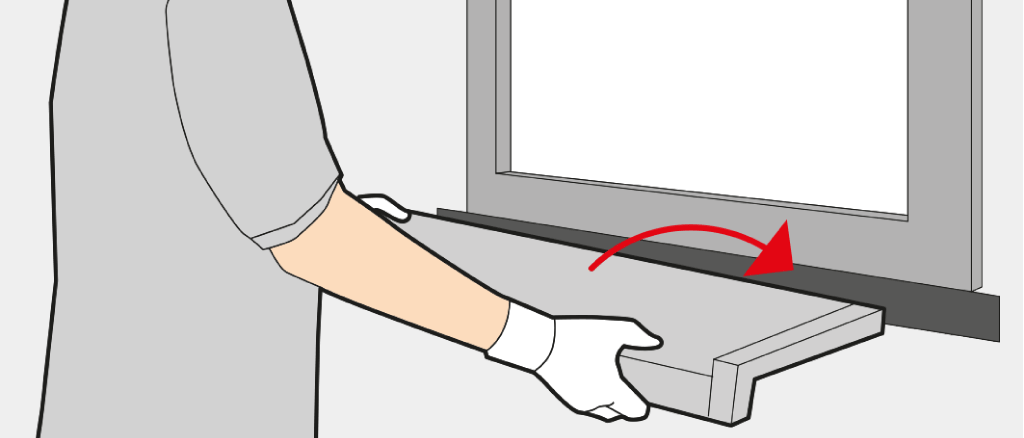
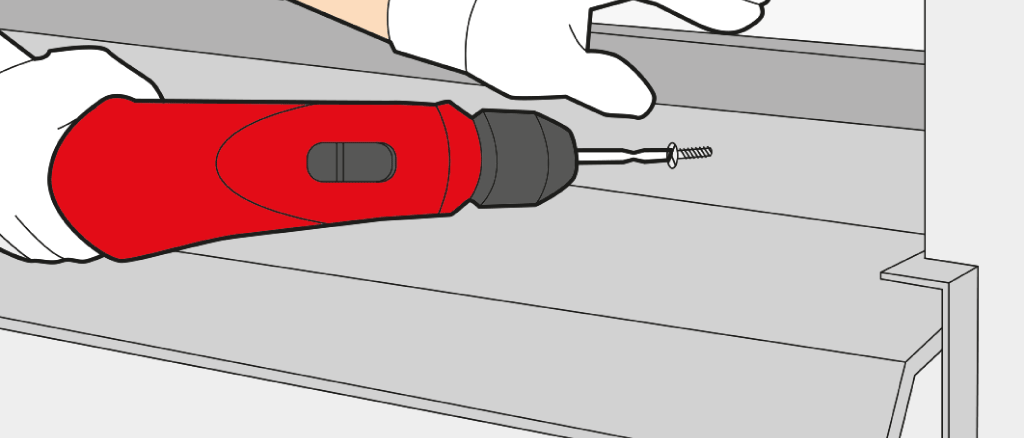
To install an inside sill, you have to follow a very similar procedure:

  • All important tools and materials need to be available
  • Double check that the older version has been removed properly?

The installation of outer window sills can also be performed without the help of professional window fitters. The average mounting time of 30 minutes is increased if you want to install more than one sill. Please note that the mounting time will decrease after you become familiar with the procedure.

Please be very careful with the windows. In order to avoid damage, they should be covered with sheets or protective foil. Especially wooden or aluminium frames are very vulnerable to scratches. Resistant uPVC models should also be covered or even taken out of the hinges.

b) How to install the Component

Mounting inside is slightly different from the procedure outside. Even if you have already performed this kind of mounting inside, it is still recommended to read these instructions carefully.

  • Attach the accompanying sealing tape to the bottom of the new construction element. Choose an appropriate distance from the front edge to ensure that the sealing tape is no longer visible.
  • Install the sides to the board. Try not to touch the sealing tape and do not push them further than the buffer (Fig. 2).
  • Insert the sill into the groove at the window (Fig. 3).
  • Attach vapour resistant jointing.
  • Install the component with the accompanying washers. Make sure to have an angle of no less than 5 degrees – this will ensure that the water runs off smoothly (Fig. 4).
  • Seal the side finishes with silicon or acrylic.
  • Remove the cement and plaster residues.
  • Now you can remove the protection foil.

After you have performed all necessary steps, you have to ensure that there are no leaks in the construction area that could lead to water running inside the house. If you have installed several sills, you must check each component for constant quality.

Small mistakes can occur even during routine working procedures. You have probably performed all steps with one sill, but may have forgotten an important step at another. This could lead to leaks in the window. After everything is checked and all windows work properly, you are finished with the installation.

Was this information useful?
1
2
3
4
5
(2 ratings , Ø 5)
to top