+++ Save online price advantage now +++

How to Remove a Window Roller Shutter

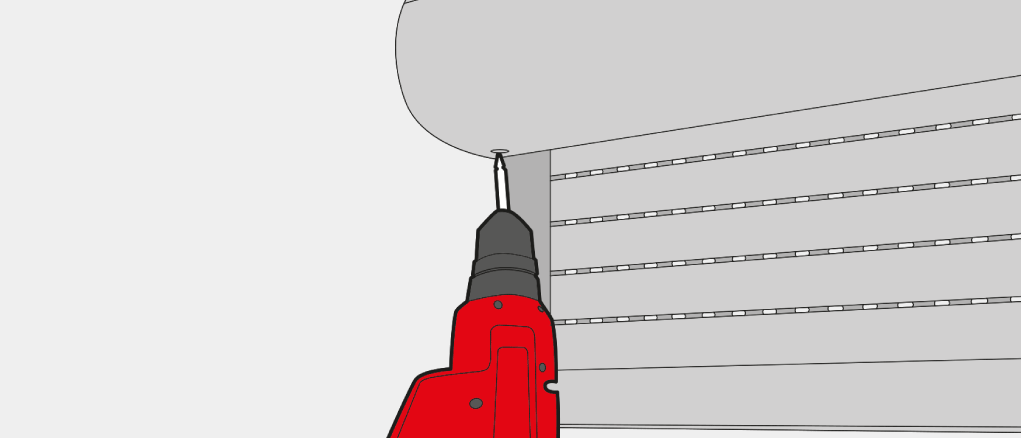
Window roller shutters are one of those inventions where you only realise what you had as soon as you don’t have them anymore. Therefore, it is important to remove them correctly when repairing or replacing the entire roller shutter. If a window shutter has to be removed, exchanged or repaired, you will need the appropriate tools, one or two hours of time and this manual, which will teach you the basics of removing.

Materials

  • A new cord (if necessary)

Tools

  • An appropriate screwdriver
  • Hammer and chisel
  • Working ladder

1. Preparation

This manual provides all necessary information for the removal of window roller shutters. Please consider that the steps for installed and mounted types are different. First, you need to check which type of window roller shutter needs removing and then focus on the respective part of this manual.

Please also make sure that all above listed tools and materials are within reach. This will save time during the procedure. If you only want to exchange the window roller shutter, you should also make sure that the new system is ready for installation. This manual also provides tips and tricks for quick removing.

Especially with larger window roller shutters, it can be much more advantageous to work in a team of two.

2. Exchanging Installed Roller Shutters

These types can be perfectly integrated into the house facade. In order to remove these systems, you will have to use a different strategy than with mounted types.

  • Check the roller shutter box and cover, normally located on the downside of the wall box. Detach the cover – if the boxes are plastered or wallpapered you may have to find the screws first (Fig. 1a and Fig. 1b).
  • Remove the rubber stopper or the angled end rod (Fig. 1c).
  • Detach the cord. To do this you have to completely lower the window shutter curtain and remove the lamellar that is connected to the roller shutter shaft. Turn the shaft, until the cord is completely unrolled and remove it from the winder (Fig. 1d and Fig. 1e).
  • To remove the lamellar elements you have to pull the completely lowered shutter curtain out from above inwards (Fig. 1f).

Tip: If you only want to secure the cord and not remove it, you can leave it in the cord winder and make a knot in it. This will prevent it from rolling back in.

3. Exchanging Mounted Variants

These types usually have a bigger profile and can be seen above the masonry. This is why it is slightly easier to open the case. There are only small differences in the removal of installed and mounted window roller shutters.

  • Remove the screws from the box cover. They can usually be found on the left and right side of the box. Lift the cover off (Fig. 2).
  • From here you can perform the steps from section 2., until you reach the step in which you have to remove the window shutter curtain. The lifting and replacing of the curtain only differs from mounted systems in its removal direction.

If you want to completely remove the window shutter box, it is normally enough to take out the curtain and the cord first. You should then be able to remove the box easily from the masonry.

4. After the successful Removal

After the window shutter has been successfully removed, you can start removing the windows or installing a new lamellar element. windows24.com also offers a respective manual for this task. Please note that there are differences in the installing and removing process for windows and doors; depending on whether the building is old or new. Installation and removal can be relatively easy procedures that can be performed quickly and without the need for professional help. Do-it-yourself enthusiasts will therefore be able to save time and money.

Was this information useful?
1
2
3
4
5
(20 ratings , Ø 4)
to top