-
 Windows
-
 French Doors
-
 Patio Doors
-
 Front Doors
-
 Roller Shutters
-
 Window Sills
Excellent
 Windows
French Doors
Patio Doors
Front Doors
Roller Shutters
Window Sills
Windows
French Doors
Patio Doors
Front Doors
Roller Shutters
Window Sills
Every door – be it a front, balcony or garden door – tends to lose some of its appealing aesthetics through normal wear and tear as time passes. Furthermore, it is a fact that many older models no longer meet our demands like the newer ones do. When you decide to purchase new French or patio doors, you do not have to rely on professional help for the installation. Would you like to install French doors yourself? This manual will assist you, describing the entire procedure, step-by-step, and listing all necessary materials and tools. The necessary tools and materials are as important as the construction components. The following list shows all elements, which should be at hand at the working place when you start to install French doors.
Materials
Tools
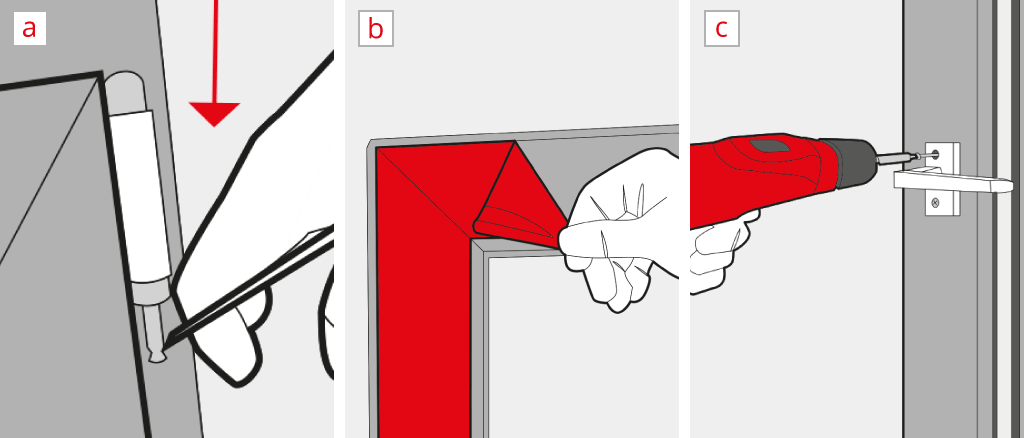
In order to install new French doors, the old systems have to be removed. Here, you can find a detailed step-by-step manual to help with the removal of French doors. The measurements of the reveal and new component should be re-measured and compared before the installation. This step ensures that the installation may be performed smoothly. The respective blueprints of the house can be very helpful to check the constructional conditions.
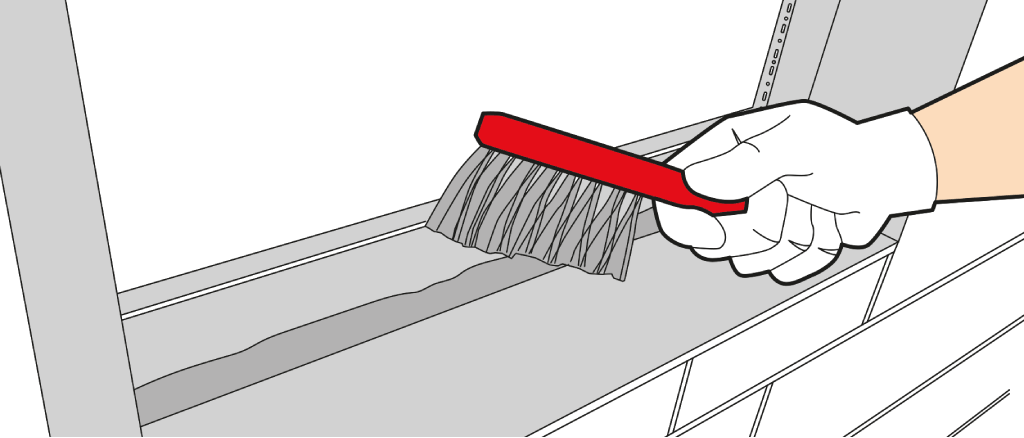
To install the components without complications, the necessary items should be placed within reach in the working area. It is furthermore suggested that you do the following small preparations before you start to install French doors:
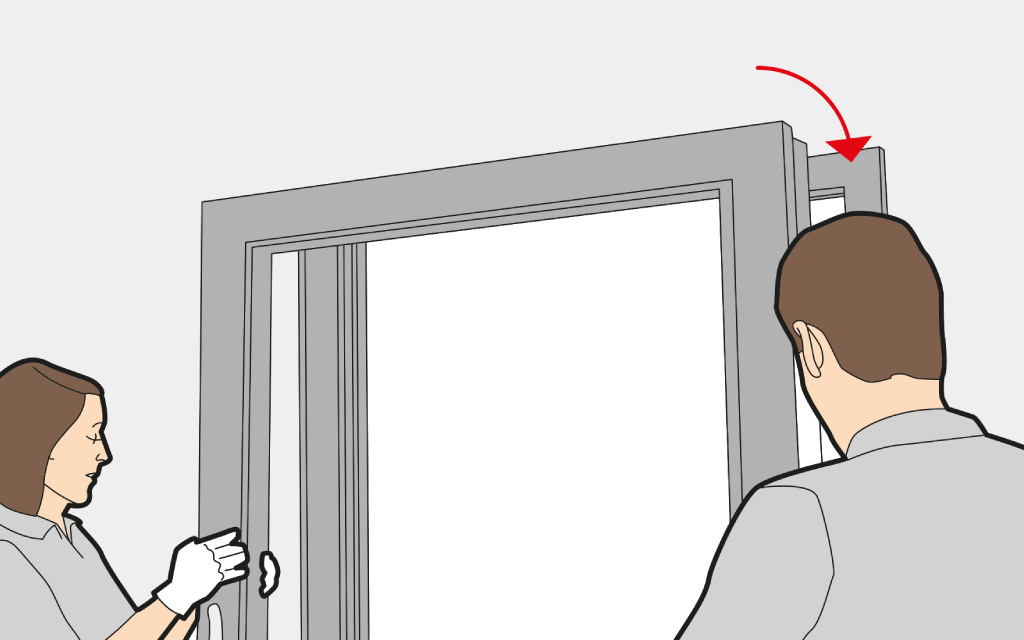
New doors for the garden and balcony are normally covered with protection foil, to avoid damages to the frame during the transport. In order to install the system, it is necessary to remove the foil from exterior section – when it is still easily accessible. The rest of the foil does not need to be removed, because it will protect the aluminium, uPVC or wood surfaces during the installation procedure (Fig. 2b).
After all preparations are made, you can start to install your French door. The installation of French doors when working in a group of two can be finished in about two to three hours – similar to the procedure with front and garden doors.
The installation of a certain type of sealing is substantial for thermal insulating and therefore a necessity for energy efficient doors. Every model needs up to three different sealing levels:
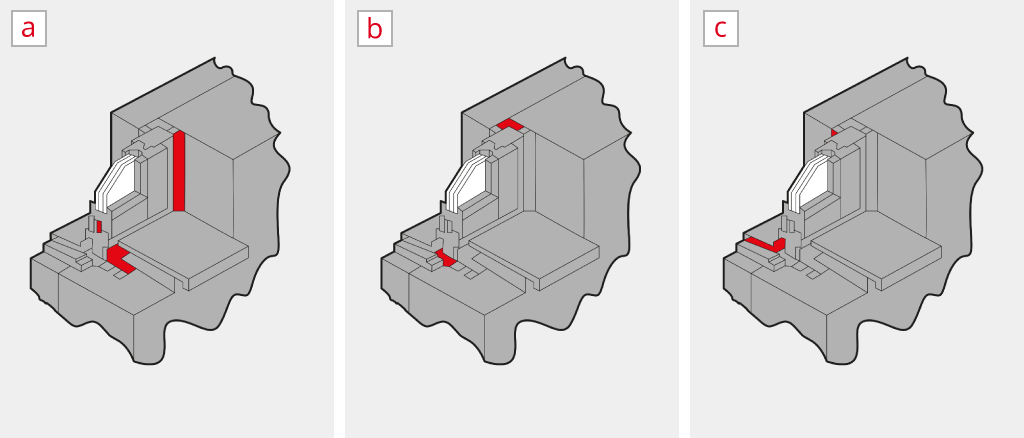
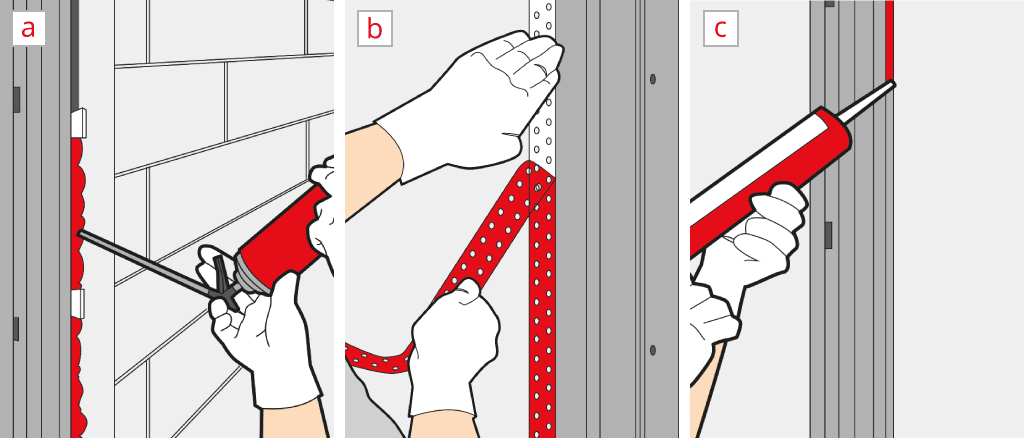
This layer separates the exterior from the interior climate. When working with French doors you can work with vapour resistant foil or acrylic jointing (Fig. 3a).
This layer is the primary element for thermal insulation. It needs to be filled with insulating 1-component-PU construction foam. In order to prevent allergic reactions, it is also recommended to install filling materials, such as cotton or mineral fibres (Fig. 3b).
The "outer" sealing is very important, as it protects your home from atmospheric influences. This is the reason why it must be constantly impact rain proof and open to vapour diffusion. The insulation is normally achieved with pre-compressed tapes, silicon jointing or foil open to vapour diffusion (Fig. 3c).
It is important to install high quality insulation materials correctly, to save money on energy in the long term. The accessory shop of windows24.com offers the right materials for all types of sealing for the installation of windows and French or patio doors.
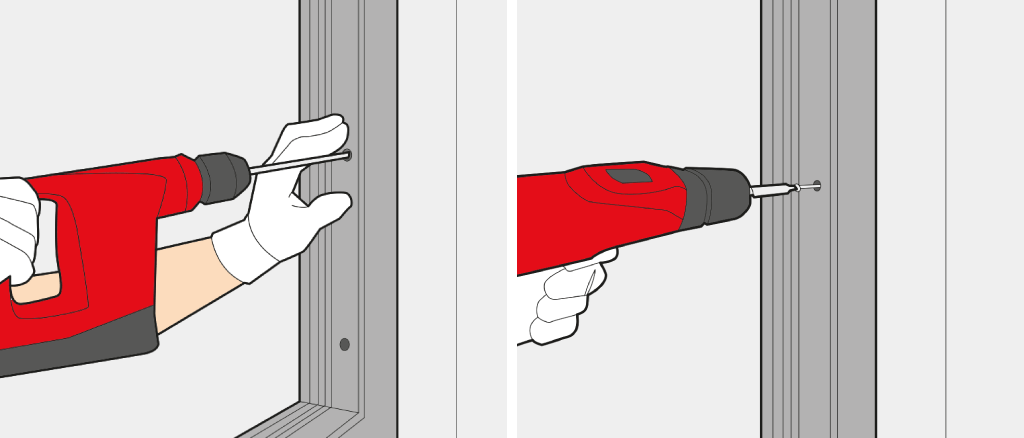
The installation of window frames and doorframes must to be performed very precisely. It is essential to use a tape measure and the accompanying washers for this step.
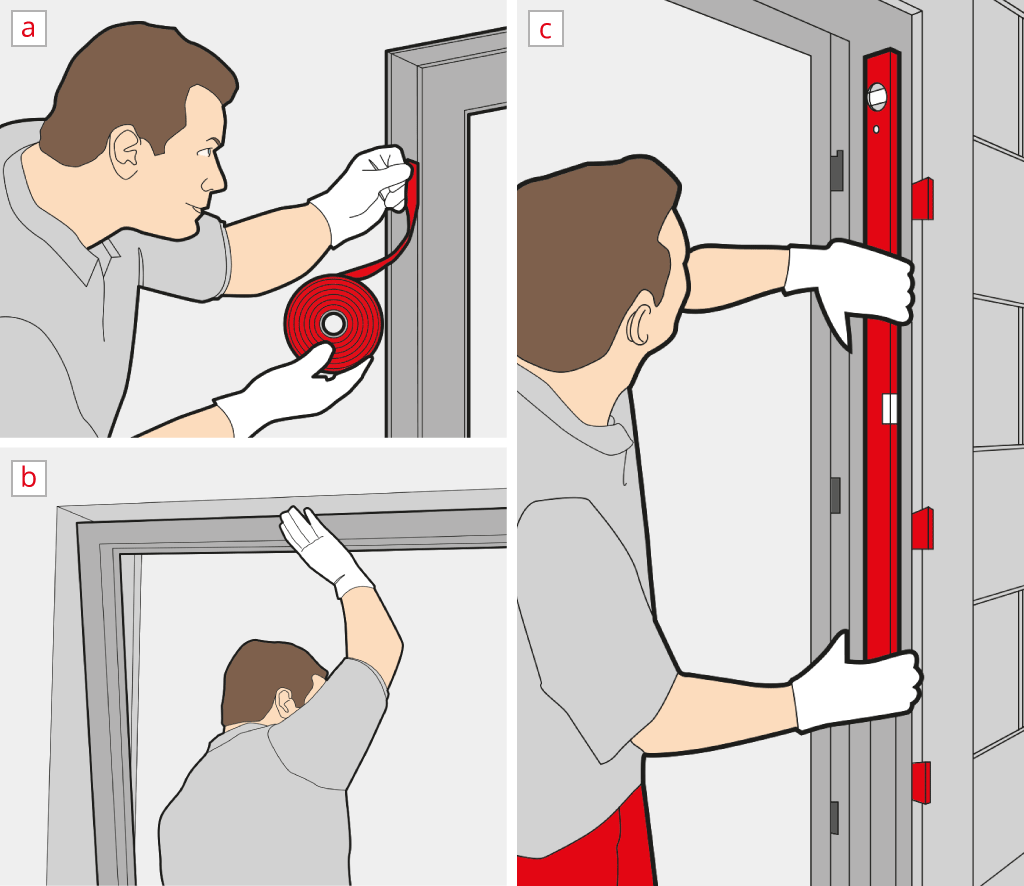
Before you can continue to install the frame, it must be perfectly aligned.
The next step is the foaming of the gaps between the doorframe and wall opening. When using sealing tape for the outer level, the tape must fully extend before the foaming procedure begins.
The installation of the doorframe is now almost complete. The final step is the insertion and adjustment of the door leaf.
Energy efficient living can be achieved with the right windows and doors. This manual demonstrates the basics of fenestration and helps you save money on hiring professional help. Should you wish to install other products, the procedure is very similar for front and patio systems.